Video

Publishing a new blog post

Watch Publishing a new blog post on Vimeo

In this tutorial, we’ll go through how to write and publish a new blog post. To get caught up on Familiarizing yourself with Siteleaf watch our previous video in Siteleaf for Content Managers and Creators.

Writing a new blog post

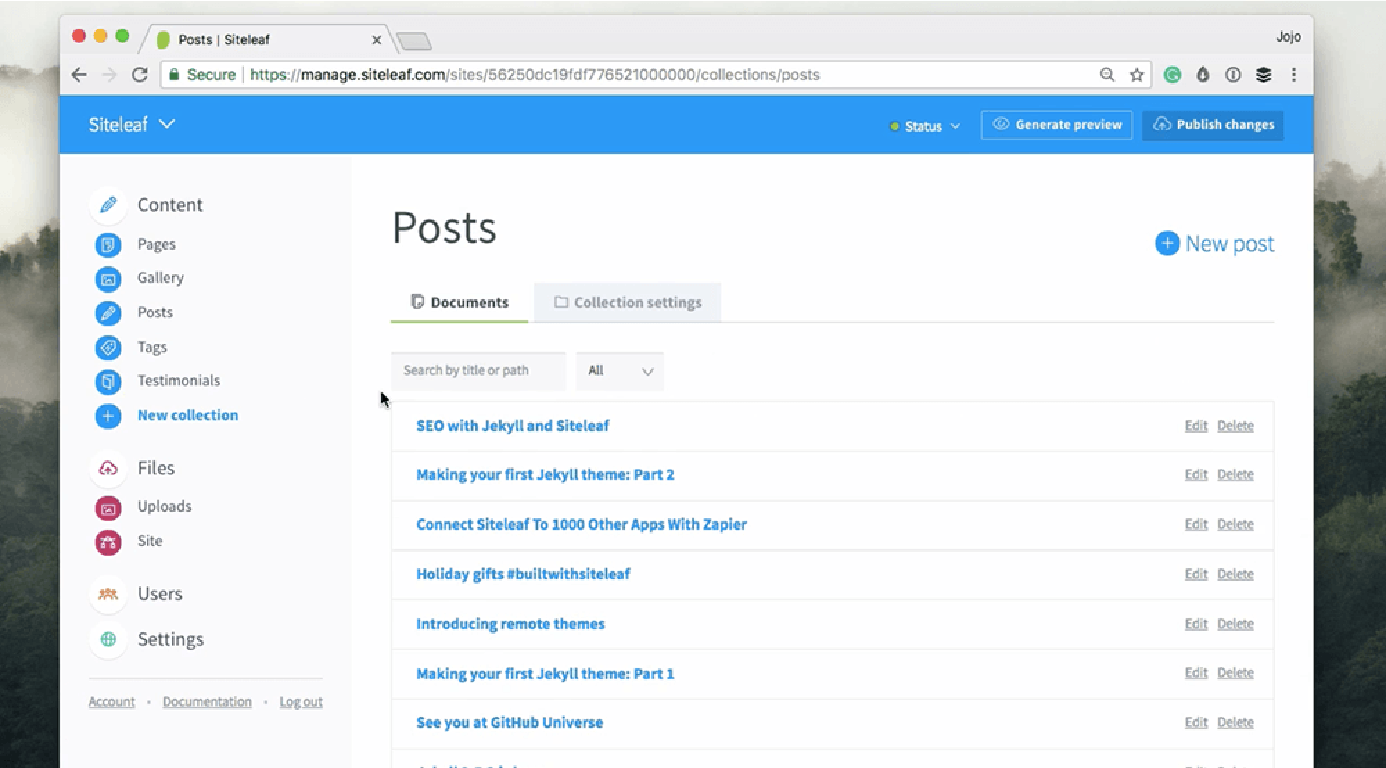
Head up to the sidebar and click on Posts, located in the content section of the sidebar. When you click on posts, you’ll see something like this.

1-screen-shot-of-posts-small.png

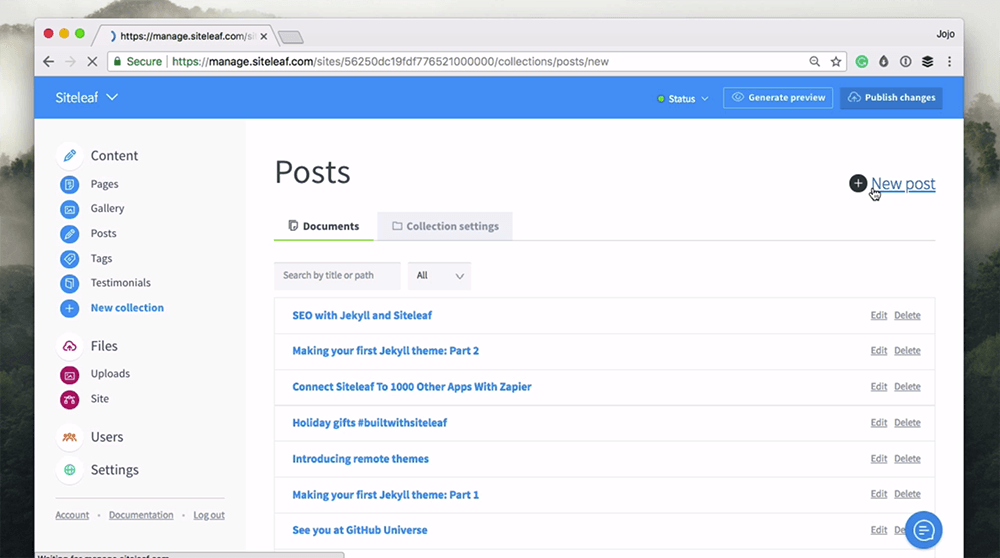
To create a new post press the plus icon on the right side and it’ll take you to a screen that looks like this.

Read more

Siteleaf for Content Managers and Creators

Watch Siteleaf for Content Managers and Creators on Vimeo

Our new series of tutorials will walk you through everything you need to know about adding content to your Siteleaf site. There’s no code involved, so you can feel confident using Siteleaf.

Familiarizing yourself with Siteleaf

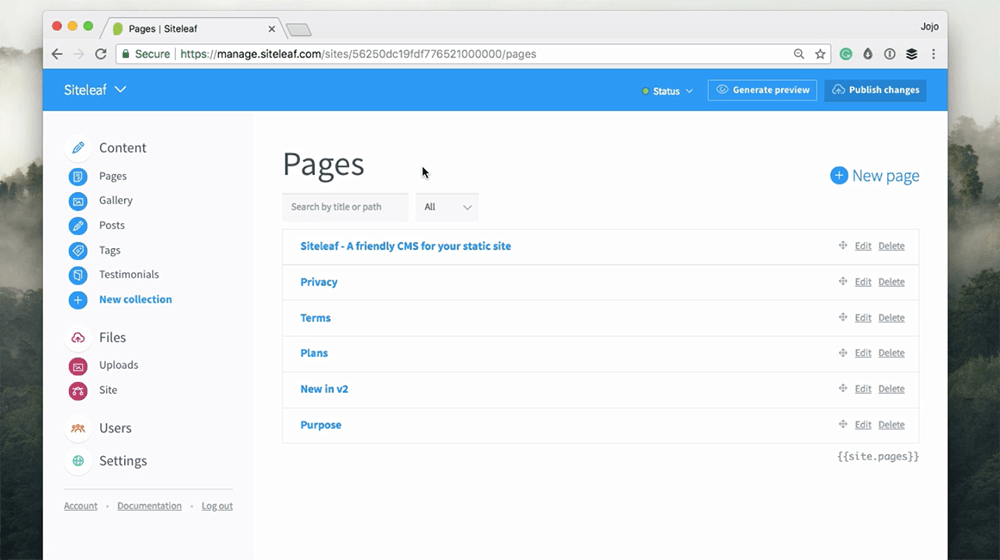
When you log in to your account you’ll see something like this.

Screen Shot Dashboard.png

This is the Siteleaf Dashboard. The first thing you’ll notice is the sidebar. Here are the elements of your website broken down into four sections.

Content

This section is organized by collections — think of these as your main content buckets.

This site has several collections, but you may only have a few options on yours. It depends on how your site has been set up.

When looking at a new website I always click on each collection to familiarise myself with the content and then look at the published website to see how they relate.

Pages

A page is the most basic content type in Siteleaf - these might include your ‘about’ page, or a ‘contact’ page. See more about how to edit existing pages here.

Posts

As a content creator, you’re most likely to want to know about the blog. Posts are connected to the blog page on your website.

Screen Shot Posts.png

If your site does not have a blog, then feel free to ignore this section. You can click on the title of the post to edit.

Read more

Customizing the Siteleaf admin

Watch Customizing the Siteleaf admin on Vimeo

Siteleaf v2 was built to be customized. In this tutorial, we’ll dive deeper into the Siteleaf admin and learn some tricks on how to tweak the interface to suit our needs. We’ll cover collections, permalinks, metadata, smart fields, defaults, and user roles.

If you followed the previous tutorials, you should now have a basic understanding of Jekyll and the Siteleaf admin. Feel free to check those out first if you haven’t.

Watch the video above, or follow along with the text version below.

Collections

By default, you should have 2 content areas: Pages and Posts.

Pages is your home for standalone content like your about page, contact, FAQ, and so on. Pages can be drag and drop ordered, and nested using the move icon next to each page.

Posts is a default Jekyll collection that’s blog-aware, so each piece of content here (called documents) is stamped with a date, and generally shown in date-descending order.

The Posts collection also comes with some special features: drafts, tags, and categories.

If these features are useful to you, but the name “Posts” isn’t quite doing it for you, you’re welcome to rename this collection under Collection settings. For example, I might want to call mine “Stories” instead.

Read more
Connecting GitHub and Siteleaf

Watch Connecting GitHub and Siteleaf on Vimeo

This tutorial will show you how to connect and sync an existing Jekyll site from GitHub to Siteleaf, so you can edit content and preview your site in the cloud.

If you are new to Jekyll, you may want to start with our Jekyll from Scratch first tutorial to catch up on the basics.

What is GitHub sync?

When developing your site, you’ll generally want to keep your theme and content in sync so you can see how everything looks in context.

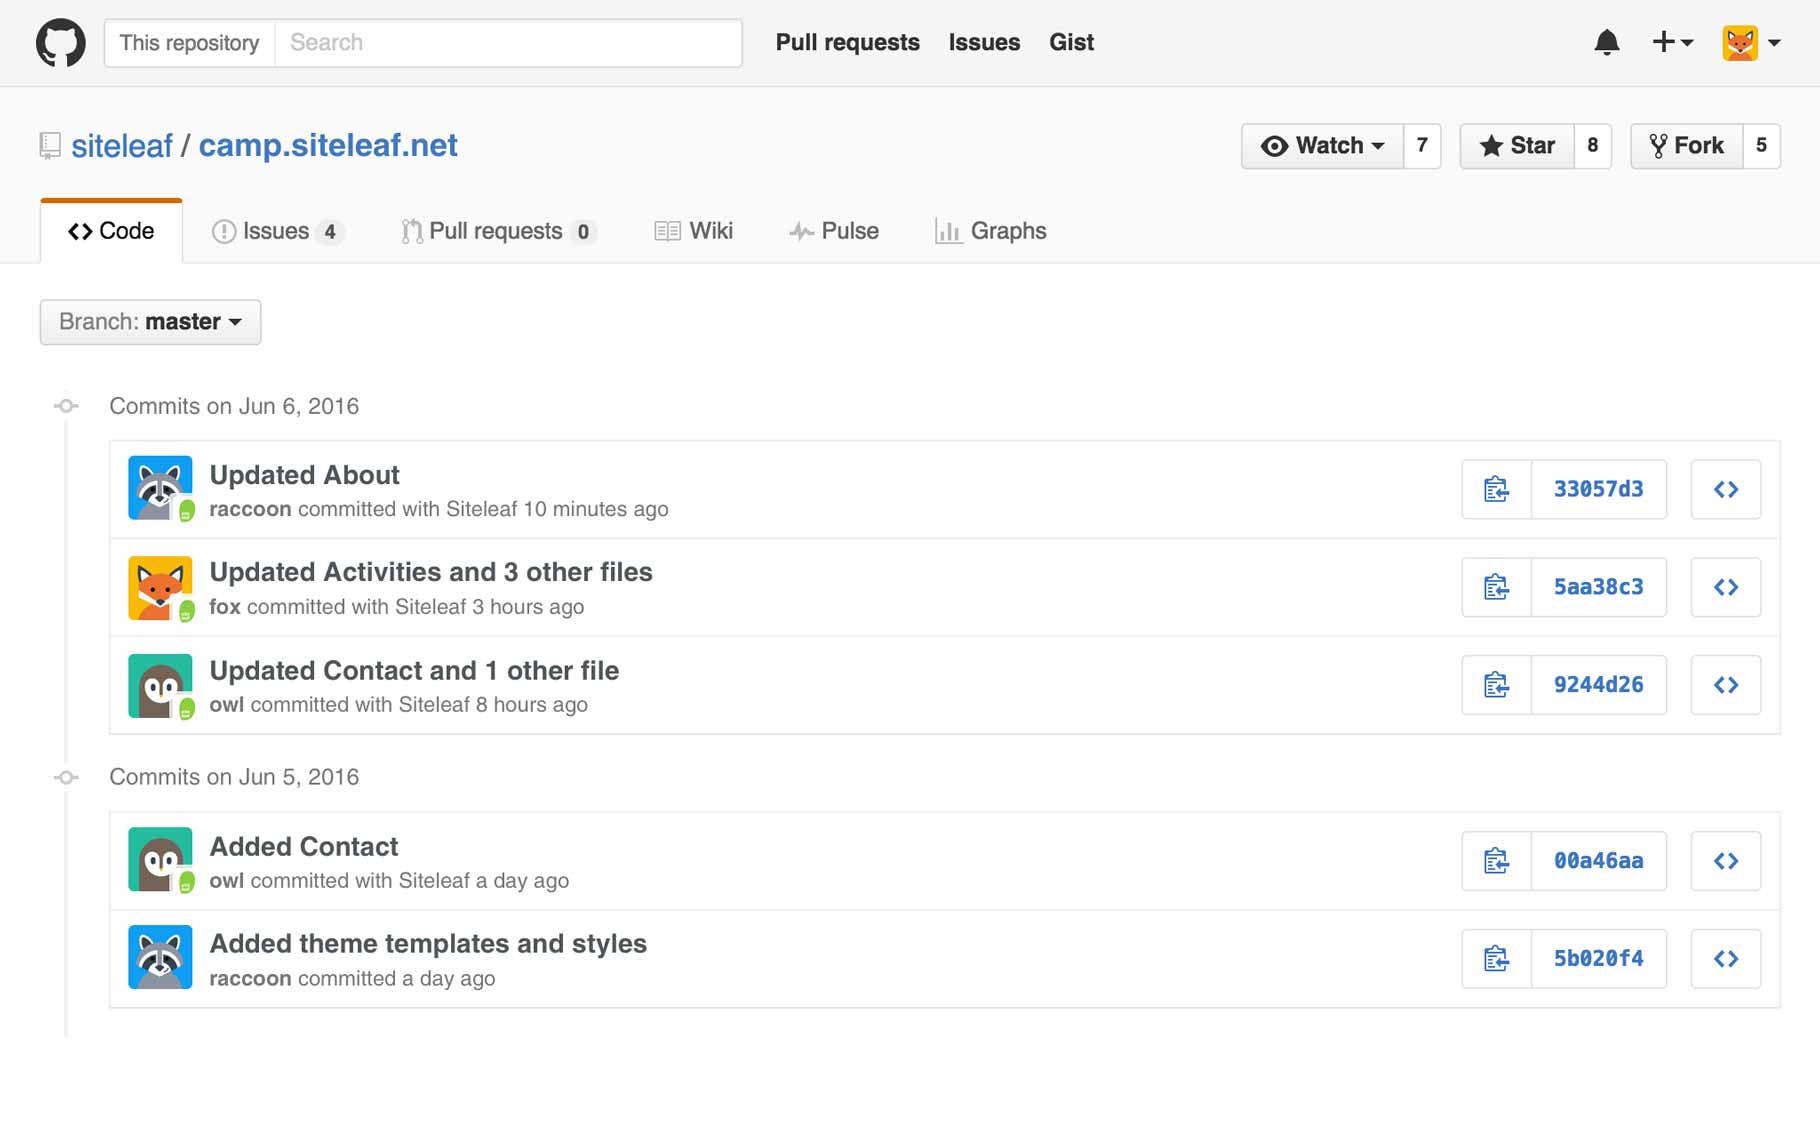
By enabling GitHub sync, any changes you make in your Git repo will be immediately saved to Siteleaf, and vice versa. So any edit you or anyone on your team makes in Siteleaf is synced and backed up. You can see a log of all changes in GitHub, and revert to any state in case anyone makes a mistake.

We like to think of it as a time machine for your content.

Read more

Jekyll from scratch

Watch Jekyll from Scratch on Vimeo

This tutorial was created using Jekyll version 3.1.6. Newer versions (3.2+) will give you a theme by default instead of _layouts and _includes. For the purpose of this tutorial you may want to downgrade to Jekyll 3.1.6 (to remove other versions, run gem uninstall jekyll). Stay tuned for a future tutorial on themes!

In this tutorial, we’ll show you how to get set up and develop websites locally using Jekyll. We’ll cover installation, creating a new site, file structure, and finally we’ll commit the new site to GitHub.

This will give you a functional website that you can edit offline. Also make sure to check out the next tutorial where we’ll connect our site to the new Siteleaf v2 so we can edit content in the cloud.

What is Jekyll?

Jekyll is a static website generator built on Ruby. It takes Markdown text (your site’s content) and Liquid templates (your site’s theme) and outputs simple HTML that can be hosted pretty much anywhere.

It’s also what powers GitHub Pages, which serves more than half a million websites.

Getting started

To get started, we are going to install Jekyll, which is available to download as a Ruby gem. We’ll be following the quick-start instructions on Jekyll’s website.

So let’s open the trusty command line.

First, you’ll want to make sure you are running a recent version of Ruby. You can confirm by running the following command:

$ ruby -v

The latest stable version is 2.3.1, but anything above 2.2 should be fine. If you need to upgrade, we recommend using something like rbenv to make it easy.

Read more

Say hello to Siteleaf v2

Watch Introducing Siteleaf v2 on Vimeo

Nearly three years ago to the day, we launched the first public version of Siteleaf. We set out to create a new kind of content management system, one that marries the best parts of a static website generator (speed and simplicity) with a traditional CMS (power and collaboration). We dreamed of a tool that could be simple, without being dumbed down. One that values data portability, and is designed for a better web. As web developers ourselves, we wouldn’t have it any other way.

Today marks a huge milestone towards this goal. We’re excited to announce Siteleaf v2 is now available, and with it comes compatibility with Jekyll, the most popular open source static site generator. Everything you already love about Siteleaf is still here (and much improved), but we’ve traded our proprietary templating system for one that’s powering over half a million websites by GitHub alone. We feel pretty good about that.

Those familiar with Siteleaf v1 will immediately feel at home with Jekyll. It’s the same HTML, Liquid, and Markdown goodness you already love, but with a bag of snazzy new tricks — including collections, nested metadata, custom permalinks, offline development, and more. Now, not only can you host your compiled site anywhere, you’re in control of your source data too.

In addition, Siteleaf v2 now syncs directly with GitHub so you can bring your existing Jekyll sites over in one click — and just as easily move your site out. Every edit you or other authors make in Siteleaf is synced to GitHub, including content and theme changes. See a log of edits, who made them, and revert back to any state with the Git tools you already use. It’s a time machine for your content.

Read more

Developing v1 sites and themes

This post refers to a legacy version of Siteleaf.

Watch Developing v1 sites and themes on Vimeo

In this video, we show you how to create Siteleaf themes using Liquid and develop sites locally using the Siteleaf Ruby Gem and Pow/Anvil.

Watch this tutorial on Vimeo.

Also see: Getting started with Siteleaf

Getting started with v1

This post refers to a legacy version of Siteleaf.

Watch Getting started with v1 on Vimeo

In this video, we show you around the Siteleaf interface and create a simple website.

Watch Getting started with Siteleaf.

Introducing Siteleaf

This post refers to a legacy version of Siteleaf.

Watch Introducing Siteleaf on Vimeo

Watch Introducing Siteleaf.